Last week, I shared my step-by-step photo tutorial for the crochet Classic Granny Square pattern. Yesterday, I showed you how I put four of those squares together to make a crochet Poncho for my youngest daughter.
I had a couple of squares left over, and a couple of my other daughters really, really wanted me to make something for them with the squares. The “put in orders” for crochet little loveys- a bear and a cat pattern.
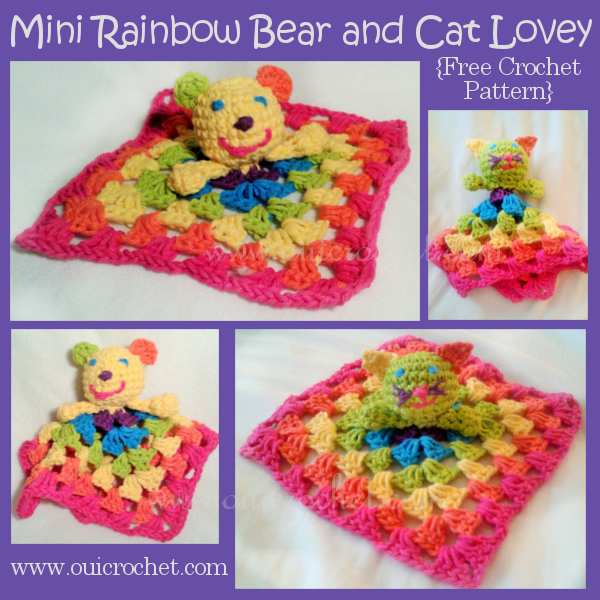
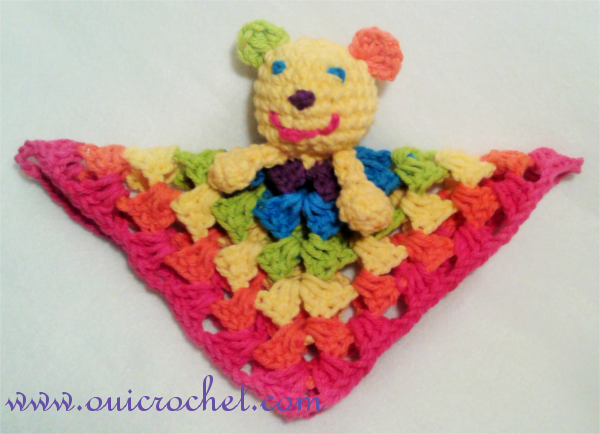
Here is what I came up with:

The square is 8 inches. The lovey’s head and arms are centered in the middle of the square and simply sewed on. The loveys can be made up quickly. They are perfect for newborns, and fun for older (… say… 4 and 8 year olds) as well. The mini rainbow loveys make a nice addition to your craft booth, and they make a fun gift. My girls were Tickled pink when they got them!
Mini Rainbow Crochet Lovey
Supplies:
Size I crochet hook
Yarn needle
Stitch marker
Poly-fil or cotton stuffing (I just used some cotton balls)
Worsted weight yarn of your choice. (I used 100% cotton)
Pattern:
Granny Square:
With color A, Ch 4, join with slip stitch to first ch to form a ring.
Round 1: Ch 3 (counts as dc here, and throughout), 2 dc in ring, ch 3, [3 dc in ring, ch 3] three times. Join with slip st to top of beginning ch 3. Finish off. (12 sts)
Round 2: Join color B to the next ch 3 corner. Ch 3, 2 dc in same ch 3 space, ch 2, [(3 dc, ch 3, 3 dc) in the next ch 3 space, ch 2] three times. 3 dc in the same ch 3 space as the first st, ch 3, join with sl stitch to the top of beginning ch 3. Finish off. (24 sts)
Round 3: Join color C to the next ch 3 corner. Ch 3, 2 dc in same ch 3 space, [ch 2, 3 dc in next ch 2 space, ch 2, (3 dc, ch 3, 3 dc) in the next ch 3 corner] three times. Ch 2, 3 dc in next ch 2 space, ch 2, 3 dc in the same ch 3 space as the first st, ch 3, join with sl stitch to the top of beginning ch 3. Finish off. (36 sts)
Round 4: Join color D to the next ch 3 corner. Ch 3, 2 dc in same ch 3 space, [ch 2, 3 dc in each ch 2 space across, ch 2, (3 dc, ch 3, 3 dc) in the next ch 3 corner] three times. Ch 2, 3 dc in each ch 2 space across, ch 2, 3 dc in the same ch 3 space as the first st, ch 3, join with sl stitch to the top of beginning ch 3. Finish off. (48 sts)
Rounds 5 & 6: Repeat round 4, using color E for round 5, and color F for round 6.
Weave in all ends.
Head:Note: Use a stitch marker to mark the first stitch of the round. Move marker up with each round.With the color of your choice, ch 2
Round 1: sc 5 in second ch from hook. Do not join. (5)
Round 2: 2sc in each stitch around. (10)
Round 3: [sc, 2 sc in next st] repeat around. (15)
Round 4: [sc 2, 2 sc in next st] repeat around. (20)
Round 5: [sc 3, 2 sc in next st] repeat around. (25)
Rounds 6-8: sc in each st around. (25)
Round 9: [sc 3, sc2tog] repeat around. (20)
Round 10: [sc 2, sc2tog] repeat around. (15)
Round 11: [sc, sc2tog] repeat around. (10)Stuff Head
Round 12: sc2tog, around. (5)
Finish off, leaving a long tail. Use tail to sew closed.Use colors of your choice to embroider on the face.
Arms: (make 2)With same color as head, ch 2.Round 1: sc 5 in second ch from hook. Do not join. (5)Round 2: 2sc in each stitch around. (10)Round 3: sc in each st around. (10)Round 4: sc2tog, around. (5)Rounds 5-6: sc in each st around. (5)Finish off, leaving a long tail for sewing.
Bear Ears:
Using color of your choice, attach yarn around a stitch on the head, for the ear.
Ch 3, 5 dc around the next stitch, sl st around same stitch. Finish off and weave in ends. Repeat for other ear.
Cat Ears:
Using color of your choice, attach yarn around a stitch on the head, for the ear.
Row 1: ch 1, sc around next 2 sts. Turn.
Row 2: ch 1, 3 sc. Turn.
Row 3: ch 1, sc2tog. Turn.
Row 4: ch 1, sc.
Finish off and weave in ends.
Assembly:
Sew the arms toward the bottom and the front of the head.
Sew the head to the center of your granny square.
Tie all knots securely and weave in loose ends.

Note: All patterns are written in American terms.
