This project is inspired by our (upcoming) visit to the Monterey Bay Aquarium.
Have you seen the Adoribilis Octopus that has taken the internet by storm? It is soooo cute! AND…
it is on display at the Monterey Bay Aquarium!
My kids and I have been following the story of this adorable little cephalopod, and we can’t wait to see it in the aquarium’s Tentacles display. The awesome folks at the Monterey Bay Aquarium were kind enough to provide passes for my family and me to do just that! Well, not just that. We are looking forward to seeing all of the marine life that our family has been studying on the aquarium’s website. If you haven’t checked out their Education page, I encourage you to do so.
Now back to this cute little flapjack octopus hat…
We will, of course, make it a point to go hang out on the beach for a little while when we visit the aquarium. I wanted to make a sun hat for our 1-year-old to wear as she explores the sand and shore. My mind immediately went to the aquarium’s newest attraction!
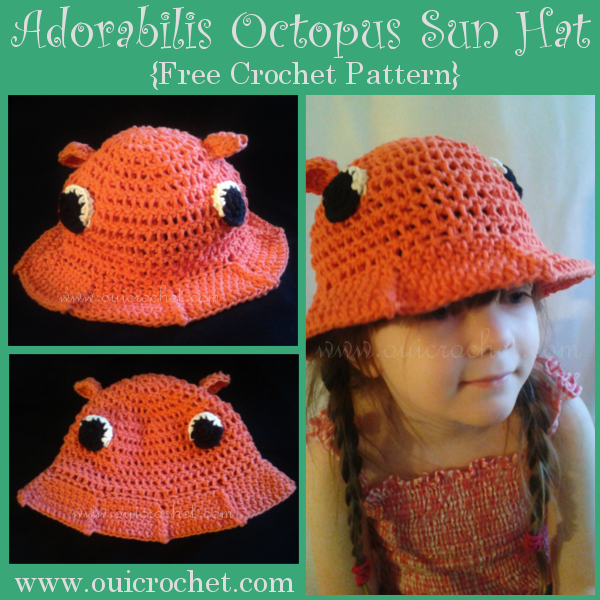
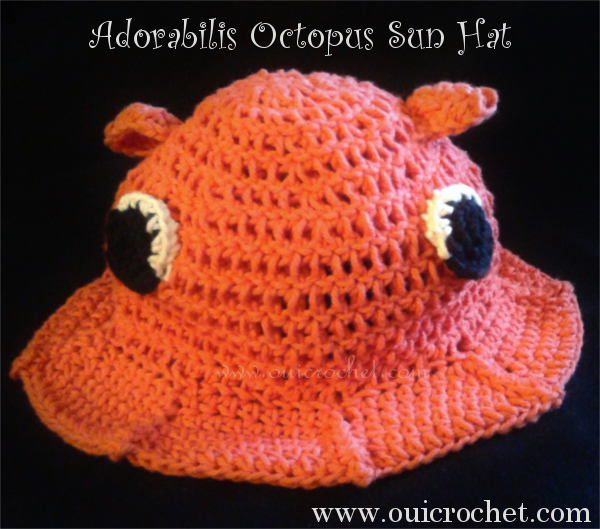
Here is the Adorabilis Octopus Sun Hat that I made:

Adorable, right?
Just look at those eyes!
And those cute little “ears” on the top? They are actually fins!
Makes you want to go see a real one, doesn’t it? I know I can’t wait!
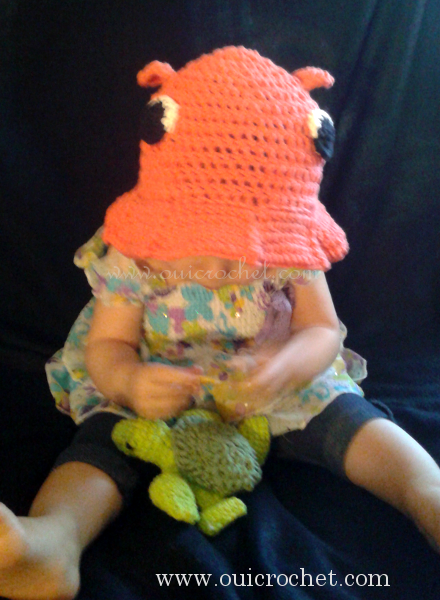
Oh, and for those of you who are thinking my 1 year old looks like a 4 year old, well, you are half right. I started taking photos too close to nap time, and my 1 year old didn’t feel like being very cooperative.

So, I let her go to sleep, and her big sister took over.
Okay, more about the hat.
The hat is made of cotton yarn, so that it breathes better. It is worked in a round from the crown to the brim. I used a front post half double crochet on the brim to get the effect of the octopus tentacles. This pattern is an intermediate level, but I think that a seasoned beginner would be able to expand their skills with this hat.
Adorabilis Octopus Toddler Sun Hat
Supplies:
Size H crochet hook
Worsted weight cotton yarn (approx. 3oz. of the main color, and scraps for the eyes)
Yarn needle
Special Instructions:
When working the first round of the brim, we will be making an increase using the following stitches:
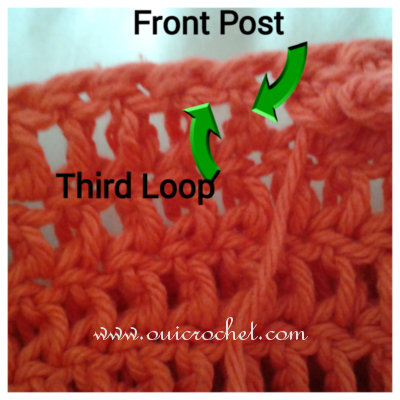
*fphdc= front post half double crochet. The stitches will be worked around the front of the post of the indicated stitch.
*front of the third loop: The stitch will be worked from the front, into the third loop of the indicated stitch.
We will work a fphdc, then work a hdc in the front of the third loop between the post just worked, and the next post we will work. Increase made.
When increasing in the rest of the brim, we will work fphdc around the post between the st just worked and the next st you will work. This increase will also form a ridge.

Pattern:
For the hat:
ch 3, join to first ch to form ring.
Round 1: ch 2 (does not count as stitch here, and throughout), dc 8 in ring, Join to first dc with slip stitch. (8)
Round 2: ch 2, dc 2 in each st around. Join to first dc with slip stitch. (16)
Round 3: ch 2, [dc, dc 2 in next st] repeat around. Join to first dc with slip stitch. (24)
Round 4: ch 2, [2 dc, dc 2 in next st] repeat around. Join to first dc with slip stitch. (32)
Round 5: ch 2, [3 dc, dc 2 in next st] repeat around. Join to first dc with slip stitch. (40)
Round 6: ch 2, [4 dc, dc 2 in next st] repeat around. Join to first dc with slip stitch. (48)
Round 7: ch 2, [6 dc, dc 2 in next st] repeat around. Join to first dc with slip stitch. (56)
(For a larger hat, continue to increase as above to desired size. Add any rounds you need to the even rounds you will work next, and continue working as instructed, adjusting your count.For a smaller hat, omit the last round or two above, and any rounds you need of the even rounds you will work next. Continue as instructed, adjusting your stitch count.See our Hat and Headband Size Chart for reference, if needed.)
Rounds 8-13: ch 2, dc in each st around. Join to first dc with slip stitch. (56)
Do not finish off.
Work the brim:
Round 14: ch 1, [7 fphdc, hdc in third loop of the dc between the post just worked, and the next post you will work] repeat around. Join to first dc with slip stitch. (64)
Round 15: ch 1, [7 hdc, hdc 2 in the next st] repeat around. Join to first dc with slip stitch. (72)
Round 16: ch 1, [9 hdc, fphdc around the post between the st just worked and the next st you will work] repeat around. Join to first dc with slip stitch. (80)
Round 17: ch 1, [10 hdc, fphdc around the post between the st just worked and the next st you will work] repeat around. Join to first dc with slip stitch. (88)
Round 18: ch 1, [11 hdc, fphdc around the post between the st just worked and the next st you will work] repeat around. Join to first dc with slip stitch. (96)
Round 19: ch 1, [19 hdc, fphdc around the post between the st just worked and the next st you will work, ch2, sl st in the same hdc just made] repeat around. Join to first dc with slip stitch. (104)
Finish off and weave in all ends.
For the fins: (make 2)
ch 3
Row 1: hdc 3 in the 3 rd ch from hook. Turn. (3)
Row 2: ch 2, hdc 2 in the first st, 2 hdc. Turn. (4)
Row 3: ch 2, hdc 2 in the first st, 3 hdc. Do not turn. (5)
Working around the sides (beginning at last st made, and ending at the first st in row 3), ch 2, work 9 hdc evenly spaced around.
Finish off, leaving a long tail for sewing. Weave other end in.
For the eyes: (make 2)
with black yarn, ch 2.
Round 1: sc 6 in 2nd ch from hook. Join to first sc with slip st. (6)
Round 2: ch 1, sc 2 in each st around. Join to first sc with slip st. (12)
Round 3: ch 1, [sc, sc 2 in next st] three times. Switch to white yarn. [sc, sc 2 in next st] three times. Join to first sc with slip st. (18)
Finish off and weave in all ends.
Sew eyes and fins on to hat.

Note: All patterns are written in American terms.
