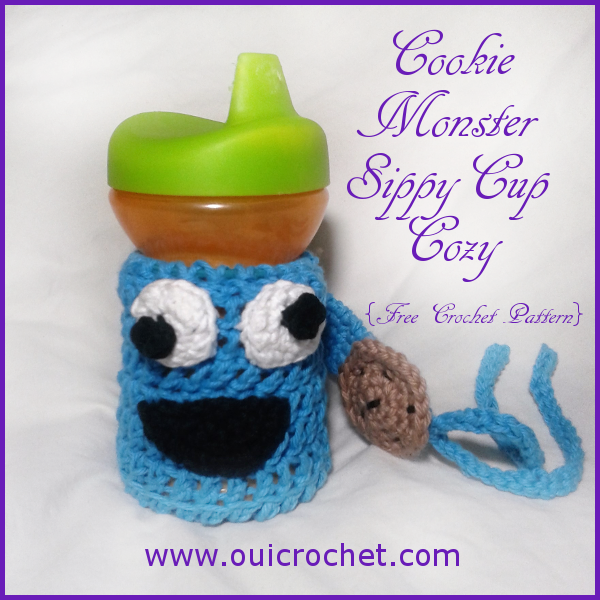
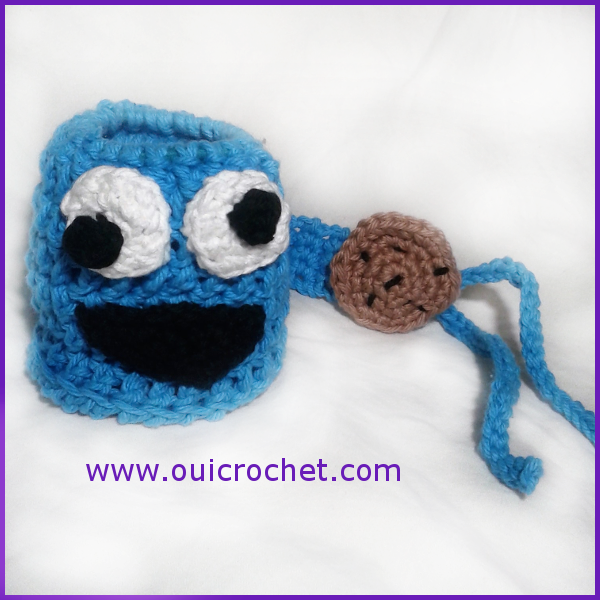
A couple of weeks ago, in preparation for our youngest’s 2nd birthday, I had just finished making a Crochet Olaf from Frozen. No sooner did I finish Olaf did our 5-year-old jump in my face, come up to me, and insist ask me to make a crochet Cookie Monster for her sister. “
She needs one for her birthday!”
Well, I don’t know about you, but for me, when I finally finish an amigurumi project, I like to wait a little while before taking on another. But, come on. How can you argue with such a sweet request?
The answer is: You can’t.
I had already planned to make some sort of sippy cozy to control the condensation problem when I stuck a sippy cup in the side of my purse. I also wanted to incorporate a strap similar to the sippy strap I had made before. The only thing I was stuck on was a design. Well, here it was! Cookie Monster!

The great thing about this sippy cozy is that it can easily be adapted to any character or design you wish. You can have fun playing with different color combinations, too!
Crochet Cookie Monster Sippy Cozy with Strap
Warning: Due to variances in crochet technique, strap length may be too long, posing a strangulation hazard. Please keep this in mind, and shorten the strap, if necessary. Use finished product only under close adult supervision to avoid strangulation.
Supplies:
Size H crochet hook
100% cotton yarn
Large ponytail holder
Yarn Needle
Stitch marker
Pattern:
Strap: With yarn attached to hook, sc 24 around the ponytail holder. Join to back loop of the first sc. Put your stitch marker in the front loop of the same joining stitch. We will come back to this stitch later.
Row 1: ch 1, sc in the back loop of the same stitch as join, sc in back loop of the next 3 sts. Turn. (4)
Rows 2-23: ch 1, sc 4, Turn. (4)
Row 24: ch 1, sc2tog, sc 2, Turn. (3)
Row 25: ch 1, sc2tog, sc 1, Turn. (2)
For the tie: ch 25, sl st in the second ch from hook and in each remaining ch, sl st in next 2 sc sts, ch 25, sl st in the second ch from hook and in each remaining ch, sl st in next sl st. Finish off and weave in ends.
Cozy: Reattach yarn to the marked loop.
Round 1: ch 1, sc in same loop as join, sc in the unworked loop of the next 3 sts, sc in both loops of the remaining 20 stitches. Join with sl st to the first sc in round. (24)
Flip work inside out.
Rounds 2-7: ch 2, dc in same st as join,dc in each st around. Join with sl st to first st in round. (24)
Round 8: ch 2, dc in the front loop only of the same stitch as join and each stitch around. Join with sl st to first st in the round. (24)
Round 9: ch 2, [dc, dc2tog] repeat around. Join with sl st to first st in round. (16)
Round 10: ch 2, [dc2tog] repeat around. Join with sl st to first st in round. (8)Finish off leaving an extra long tail for sewing closed.With yarn needle, sew long tail through remaining 8 stitches to sew closed.
Finish off and weave in ends.
Turn to right side.
Cookie Applique:
Mark first st in each round, moving up with each round.
Ch 2
Round 1: sc 6 in 2nd ch from hook. (6)
Round 2: sc 2 in each st around. (12)
Round 3: [sc 1, sc 2 in next st] repeat around. (18)
Round 4: [sc 2, sc 2 in next st] repeat around. (24)
Finish off and weave in ends.
Use darker yarn to sew to embroider chips while sewing to strap.
Eyes (make 2)
Center:
With black yarn, ch 2, sc 4 in second ch from hook. Join with sl st to first st. Finish off leaving long tail for sewing.
Eye:
With white yarn, ch 2.
Round 1: sc 4 in 2nd ch from hook. (4)
Round 2: sc 2 in each st around. (8)
Round 3: [sc 1, sc 2 in next st] repeat around [12]
finish off, leaving a long tail for sewing.
Sew the “centers” off-center on each eye.
Position eyes on the cozy and sew in place. Weave in ends.
Mouth:
With black yarn, ch 2
Row 1: sc 3 in 2nd ch from hook. Turn. (3)
Row 2: ch 1, sc 2 in each sc across. Turn. (6)
Row 3: ch 1, sc 2 in first st, sc, [sc 2 in next st, sc] twice. Turn. (9)
Row 4: ch 1, sc 2 in first st, sc 2, [sc 2 in next st, sc 2] twice. Turn. (12)
Finish off, leaving a long tail for sewing.
Position mouth on cozy and sew in place. Weave in ends.

Note: All patterns are written in American terms.
Share a photo of your finished project on our Facebook Page, and YOU can be featured on Fan Photo Friday!
