
Today I am going to show you, step-by-step, how to change to a different color yarn when you are crocheting.
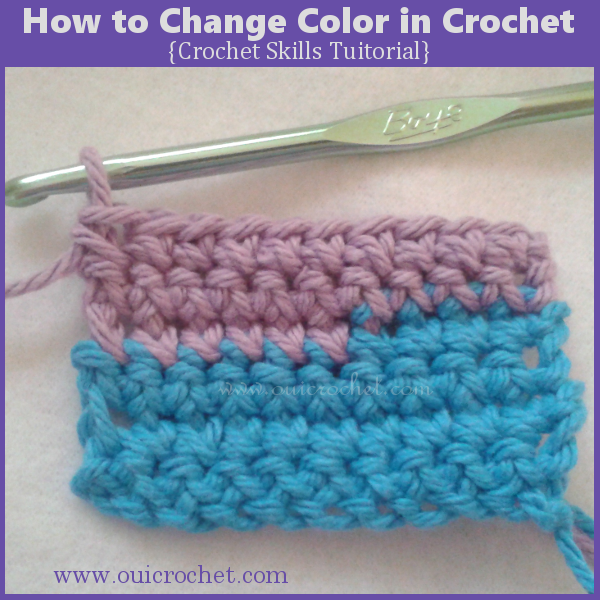
I will demonstrate how to execute the color change in the middle of a worked row, but the same instructions can apply to changing colors at the end of a row.
We will begin with instructions for single crochet, then move on to half double crochet, and double crochet.
How to Change Color in Single Crochet
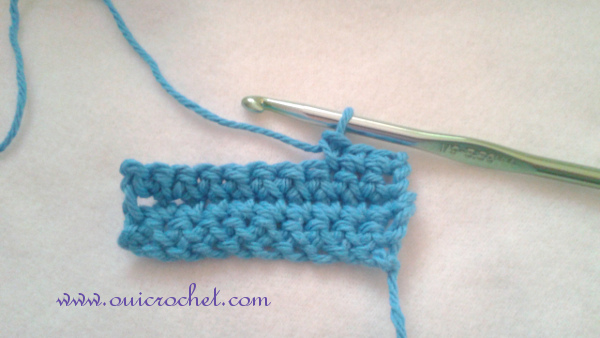
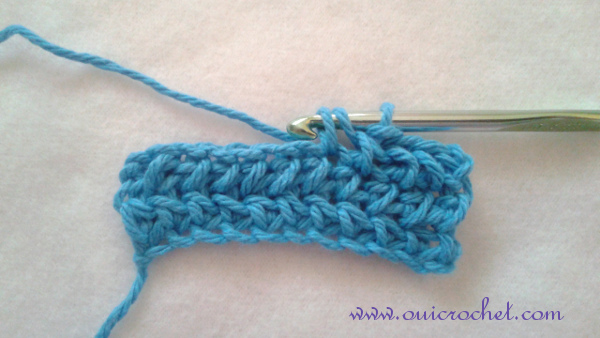
1. For this swatch, we will be changing color for the 5th stitch. Work 3 single crochets.

2. Work the beginning step of your 4th single crochet. Stop when you have 2 loops on your hook.
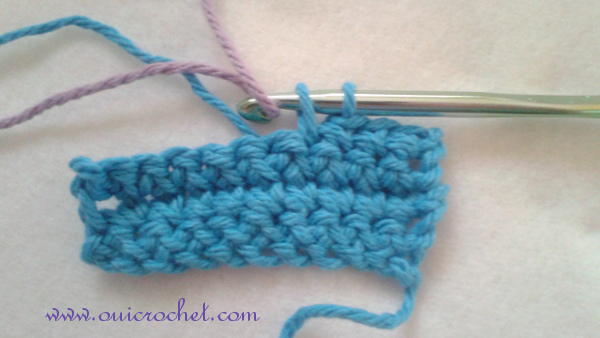
3. This is where we will begin our color change. Drop your working yarn (in this case, the blue) and pick up your new color (the lavender).
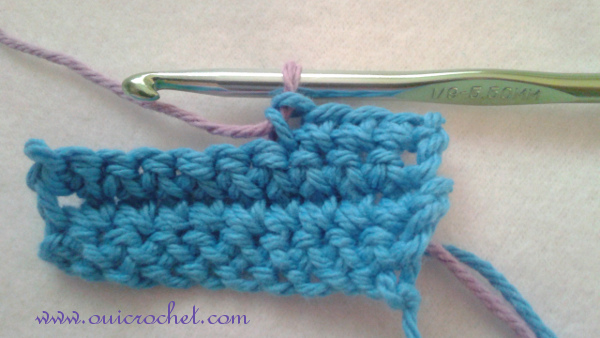
4. Use your new color to draw through both loops to complete stitch 4. Your new color is now on your hook, and ready to work.
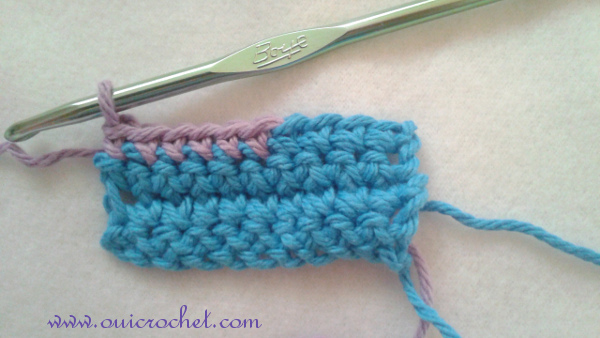
5. Continue working with your new color.
How to Change Color in Half Double Crochet
1. Again, we will attach a new color for our 5th stitch. Work 3 half double crochet stitches. Work the beginning of your 4th half double crochet. Stop when you have 3 loops on your hook.
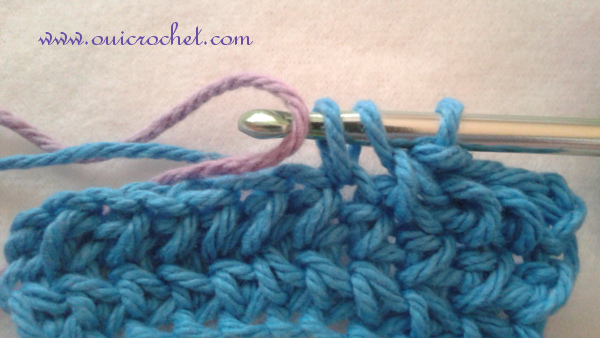
2. This is where we will begin our color change. Drop your working yarn (in this case, the blue) and pick up your new color (the lavender).
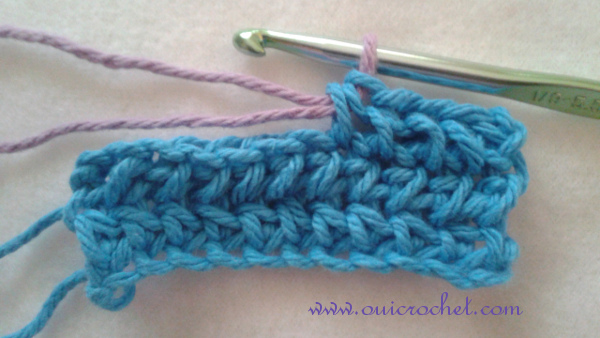
3. Use your new color to draw through all 3 loops to complete stitch 4. Your new color is now on your hook, and ready to work.

4. Continue working with your new color.
How to Change Color in Double Crochet
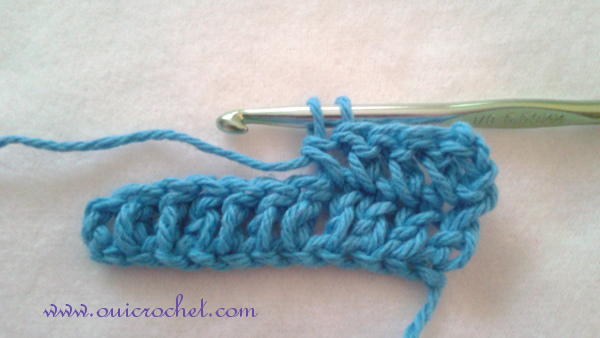
1. Once again, we will attach a new color for our 5th stitch. Work 3 double crochet stitches. Work the beginning of your 4th double crochet. Stop when you have 2 loops on your hook.

2. This is where we will begin our color change. Drop your working yarn (in this case, the blue) and pick up your new color (the lavender).
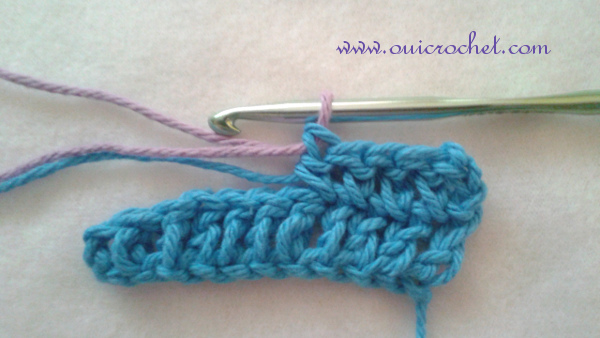
3. Use your new color to draw through both loops to complete stitch 4. Your new color is now on your hook, and ready to work.
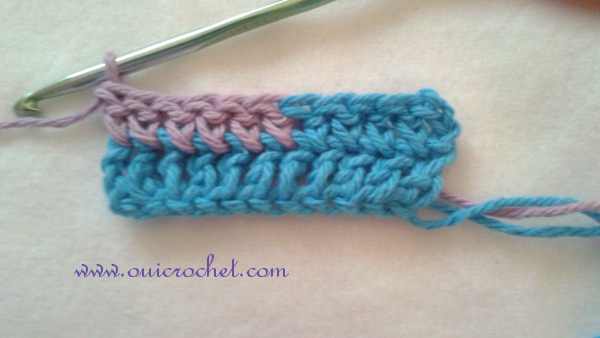
4. Continue working with your new color.
Changing color in crochet is as simple as that.
As far as finishing off the yarns in the color change, you have a few options.
- You can knot the yarn, cut it (leaving about a 6 inch tail), and weave in the ends later. (Recommended)
- You can simply cut the yarn and work over the ends.
- You can knot the yarn, cut it off close to the knot, and continue on.
I recommend the first option, as there is less chance of your hard work unraveling later.
I hope you found this tutorial helpful!
Note: All patterns are written in American terms.