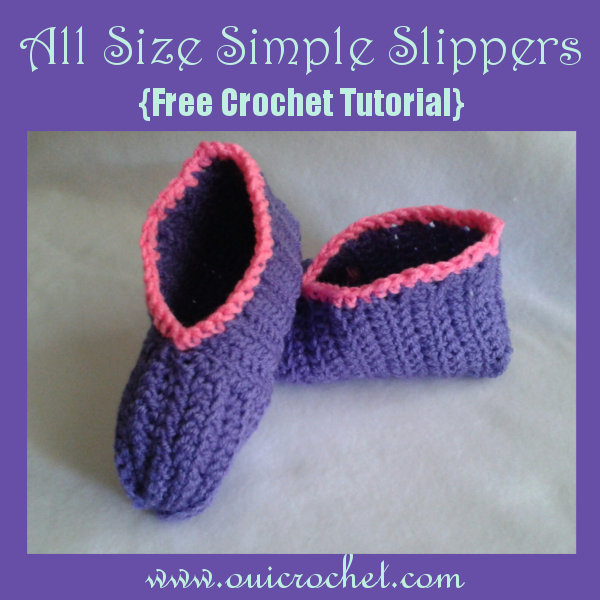
On Tuesday, I shared my pattern for Child’s Simple Slippers. Today, I am going to show you how to customize that pattern to fit virtually any foot size. All it takes is a little measuring and a couple of very simple calculations. If you look back at Tuesday’s post: Child’s Simple Slippers, you will see an example of how I used my daughter’s foot measurements to make her slippers.

I will start with the pattern, so that you can get a basic overview of what we are doing here. Below the pattern, I explain how you calculate the size you need. It is really easy. I promise!
All Size Simple Slippers
Important: See size calculation below
Supplies:
Size H crochet hook
Worsted Weight Yarn
Ruler
Yarn needle
General instructions:
Make 2
Starting at toe:
Make your starting chain as long as your calculated toe length, +2 ch.
For the first row, you will begin with a hdc stitch in the 3rd ch from hook.
If you are making child – adult sized slippers, you will hdc in each ch up until the last 5. You will sc in those last 5 sts.
I you are making the slippers for a baby or small toddler, you will sc in the last 3 stitches.
The purpose of the sc is to make the toe more narrow, and easier to cinch closed later on.
For the next rows of the toe portion, you will be working your stitches in the back loop only.
So, Row 2: ch 1, sc in the bl of each of the sc sts, hdc in the bl of each of the hdc sts. Turn.
Row 3: ch 2, hdc in bl of each of the hdc sts, sc in the bl of each of the sc sts. Turn.
Repeat rows 2 and 3 until you reach your calculated toe width, ending with a hdc stitch. It is ok if your measurement is just a small fraction off, as long as you are very close, and you end with the hdc stitch.
Working the foot:
Now you will be starting the foot portion of the slipper.
Foundation Row: You will start by working along the hdc edge of the toe portion. Hdc evenly across. You should get 3 hdc sts for every 2 rows of hdc. So, to determine how many stitches you need to work evenly across, count the rows of the toe portion. Divide that number by 2. Now multiply by 3.
After you have that foundation row of the foot portion finished, turn,
Row 2: ch 2, and hdc in the bl of each st across.
Repeat row 2 until you reach the length of your calculated foot length. You will begin your measurement at that foundation row that meets the toe portion, and end with the last row made.
Finish off, leaving a long end for sewing.
To finish:
Thread your yarn needle with the tail end. Fold your slipper in half, matching up the stitches. Sew up the heel of the slipper. FO and weave in ends.
Thread another length of yarn (2 feet should be plenty), insert the needle through corner of the end of the toe. Leave a few inches of yarn, and being careful not to pull it all the way through, weave the yarn through the toe end. Holding the tail side of the yarn, and the needle side, pull tight to cinch the toe closed. Knot tightly, but do not finish off.
Now, line up the rows of the top of the foot, and sew the top of the foot portion. Finish off and weave in ends.
Trim:
Attach a complimenting yarn to the top of the heel of the slipper. sc evenly around the opening. FO and weave in ends.
Size Calculation
(Working in inches)

- Trace the foot that you want the slipper to fit.
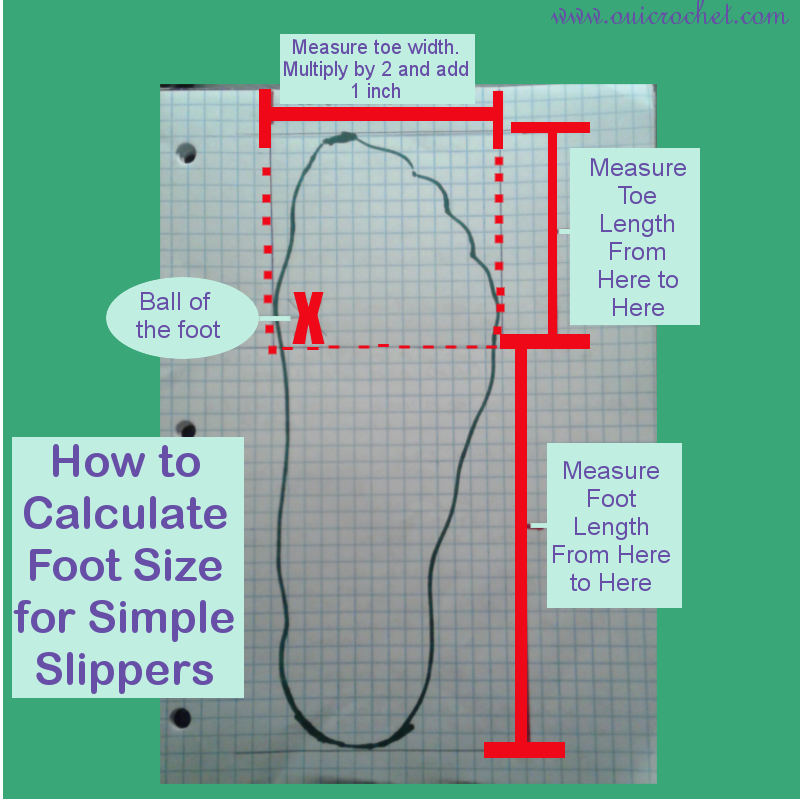
- Note where the ball of the foot is, and section off the foot as in the picture.
- Measure the toe length. This is the first measurement you will use, to determine how many chain stitches you will begin with.
- Now, calculate your toe width. Measure the width, double it (multiply by 2), and add 1 inch. This is your toe width. This will determine the length of the toe portion of the slipper. Do not add 1 inch for infant and small toddler slippers.
- Measure the foot length. Now, this isn’t the entire length of the foot. Just measure from the heel to right below the ball of the foot, where the toe portion begins. This will determine how long you make the foot portion of the slipper.
- Don’t forget to write these measurements down, and write down how many stitches and rows you needed to get your proper measurements. It will really come in handy when you are making the second slipper.
